A Variety Of Reports Can Be Generated In Bwac Like:
Employee Check In/Out Time Card Report
Security Report Event Log Report
Employee Mobile Event Usage Report
Patrol Expected Activity Report
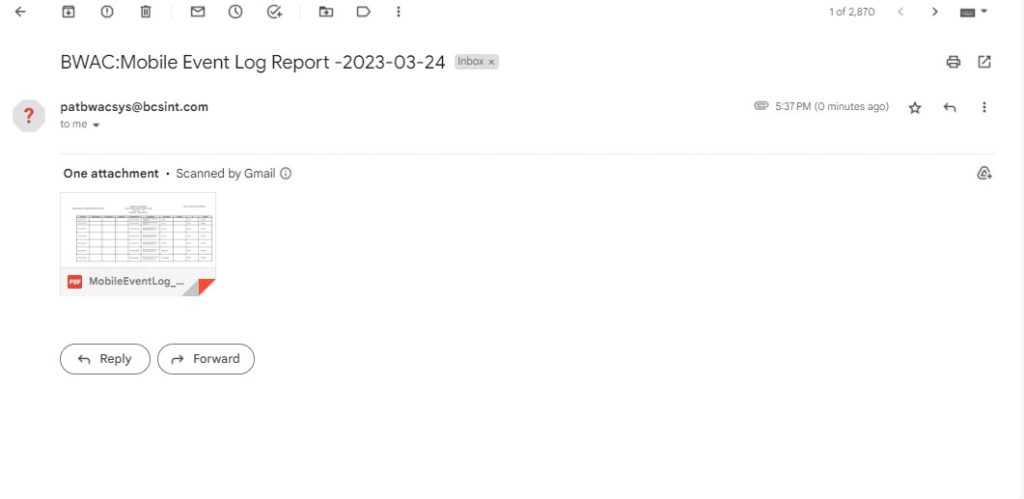
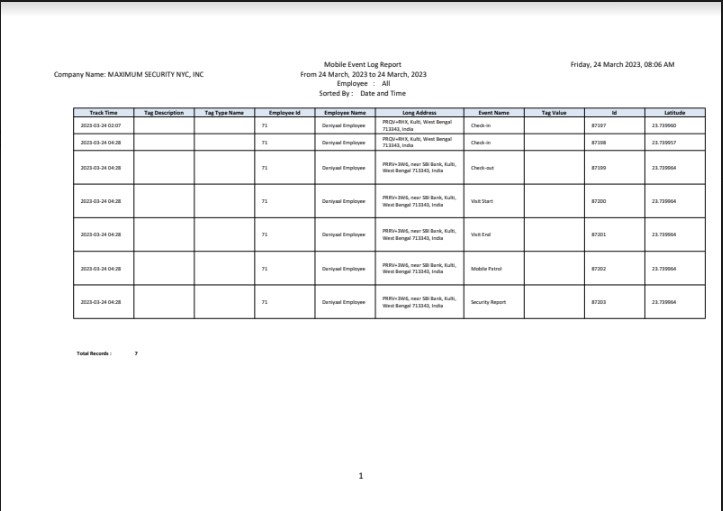
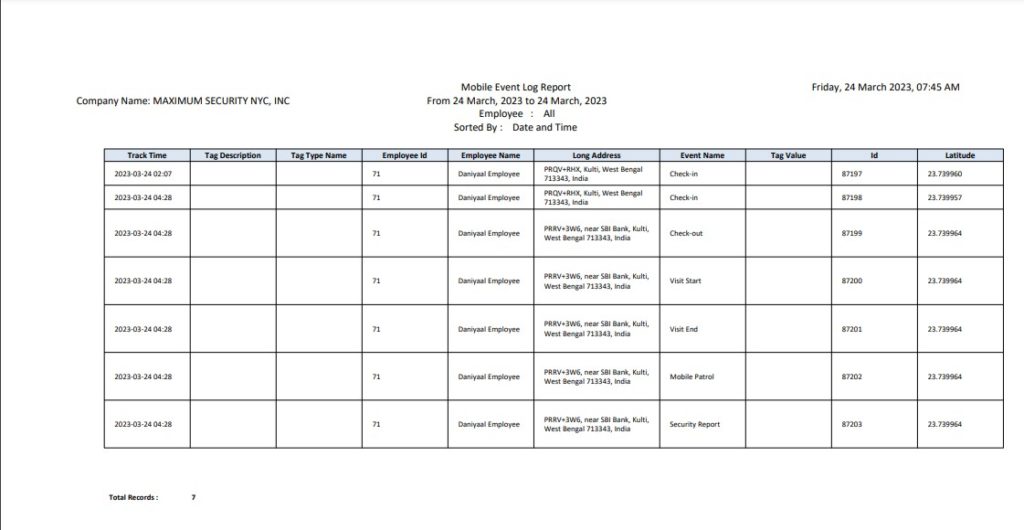
Here Example Of a Mobile Event Log Report Is Taken.
|
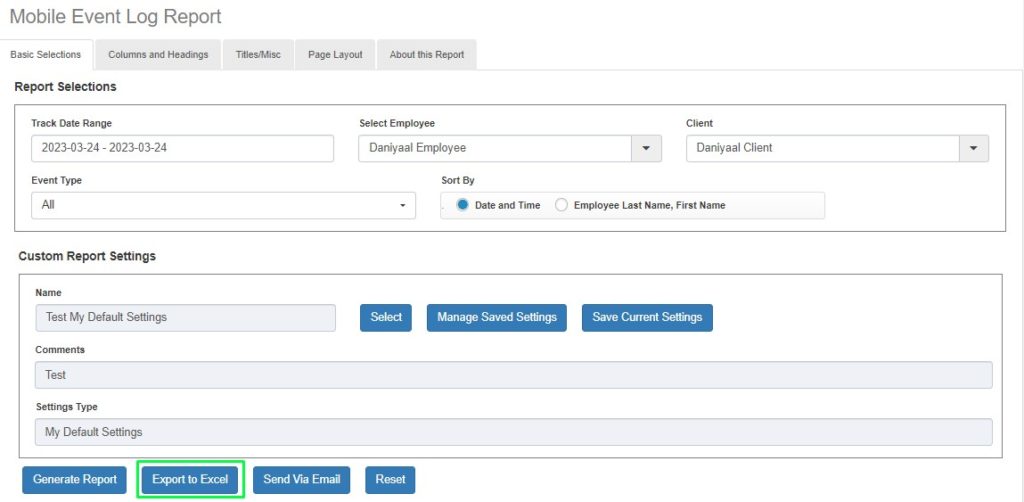
Step 1: Login To Bwac And Go To Reports > Mobile Event Log Report.
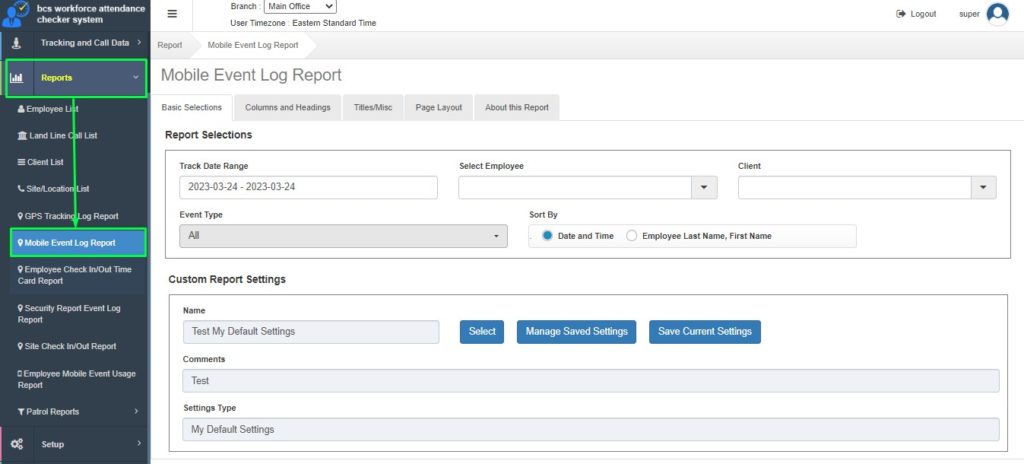
Step 2: There Are Four Search Criteria:
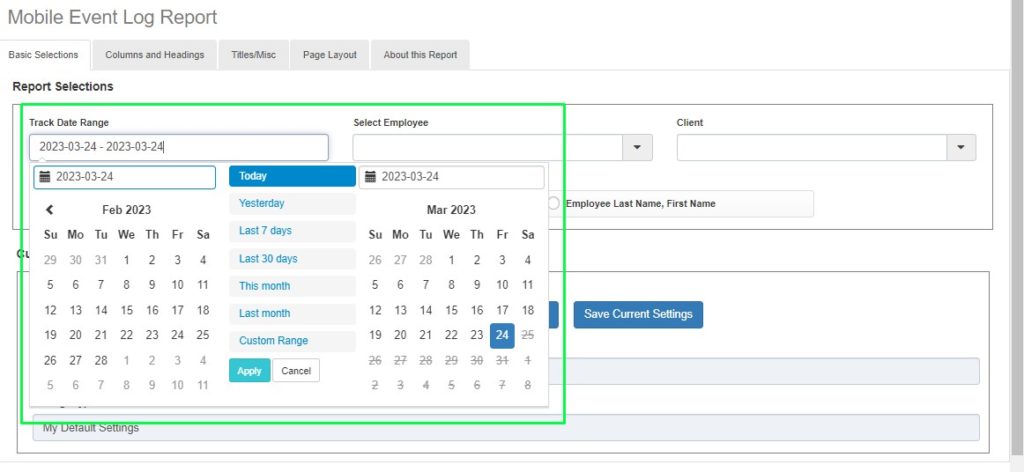
Track Time Date Range: Click On It A List Of All Possible Date Ranges Will Be Displayed. Like Today, Yesterday, Last 7 Days, Last 30 Days, This Month, Last Month, Custom Range. Custom Range Allows User To Select Any Date Range Manually Of Their Choice.
User Can Select A Date Or Date Range From The Given Options.
Step 3: Select Employee:
User Can Also Select An Employee For Which He Wants To Generate The Mobile Event Logs Report For.
Just Click On Select Employee.
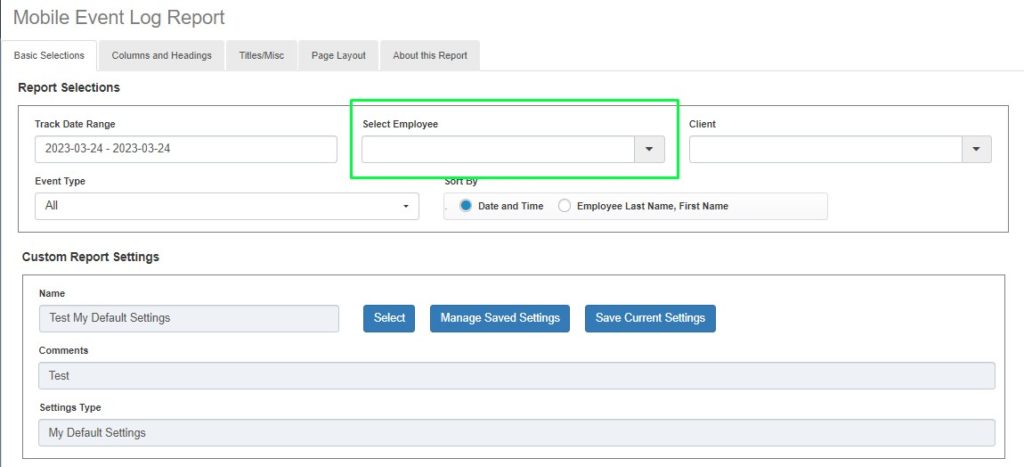
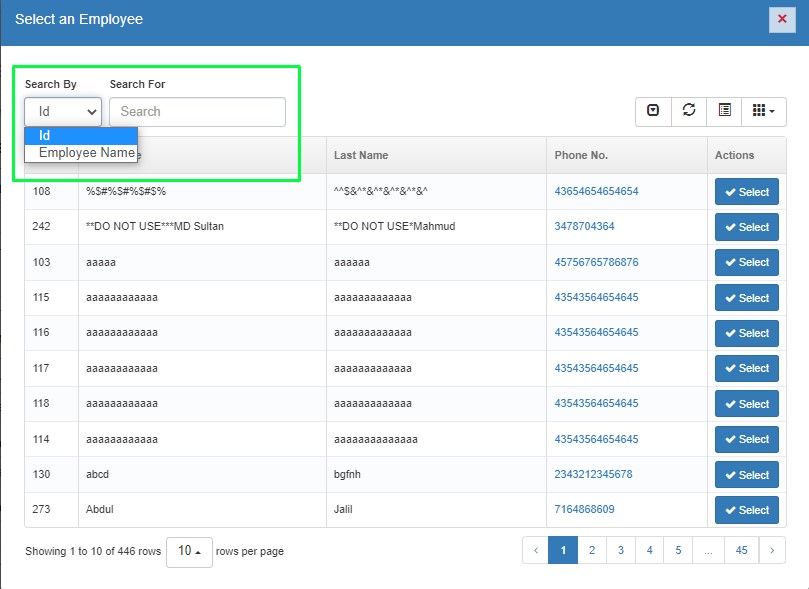
A List Off All The Available Employee Will Appear. User Can Select The Desired Employee From The List Or Can Search For It Using The Search Field Having Two Options: Search By Id And Search By Employee Name.
Step 4: Select Client:
User Can Also Select A Client For Which He Wants To Generate The Mobile Event Logs Report For.
Just Click On Select Client.
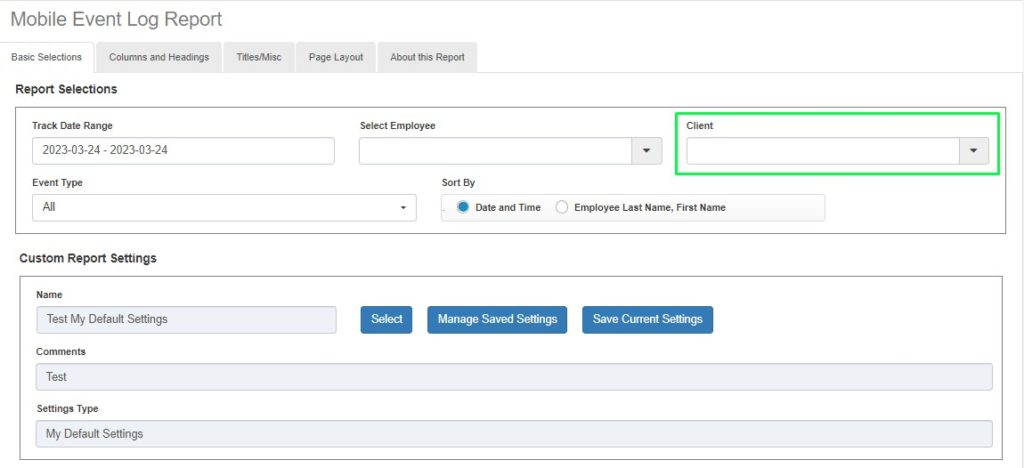
A List Off All The Available Client Will Appear. User Can Select The Desired Client From The List Or Can Search For It Using The Search Field Having Two Options: Search By Id And Search By Custom Client Name.
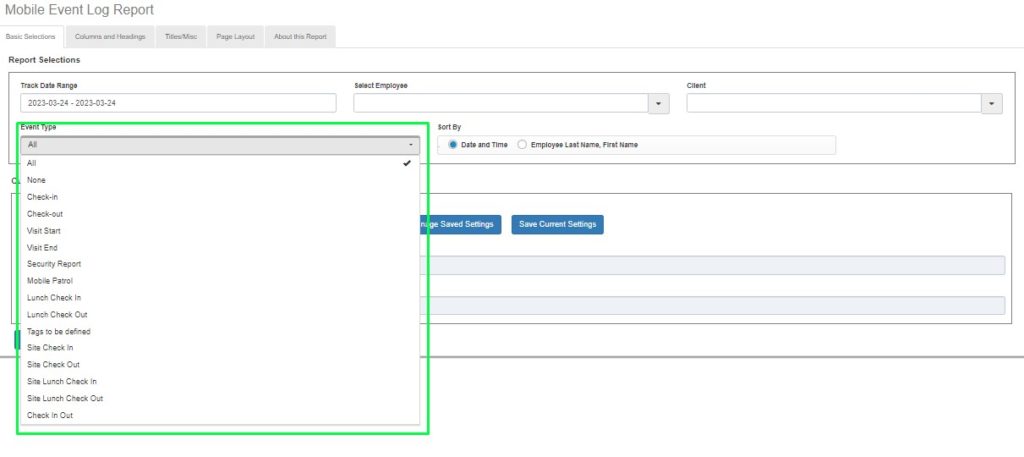
Step 5: Event Type:
User Can Also Select The Event Type From The Drop-Down List. Just Click On Event Type And A List With All The Available Event Type List Will Open. Select The Desired Option.
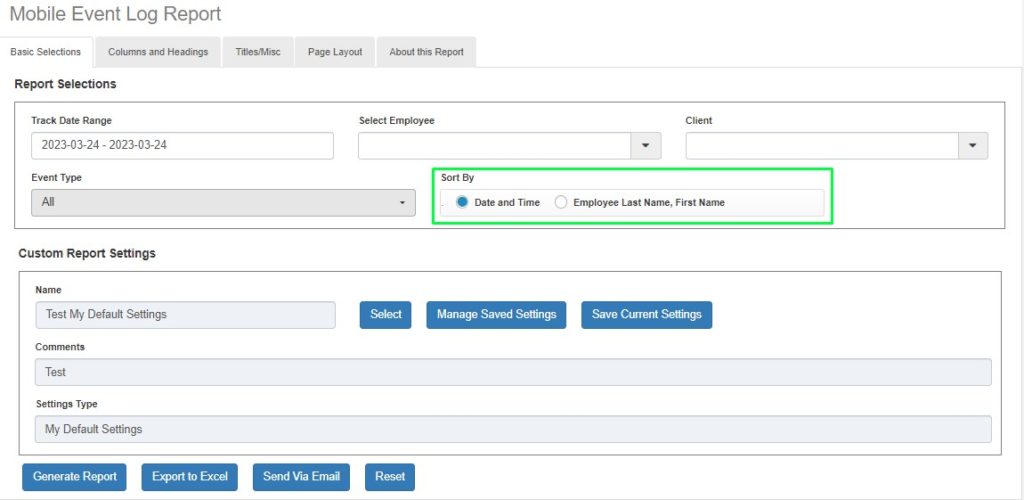
Step 6: Sort By:
There Are Two Types Of Sort By Options Available Date And Time And Employee Last Name, First Name. By Default Date And Time Is Selected.
Select The Desired One.
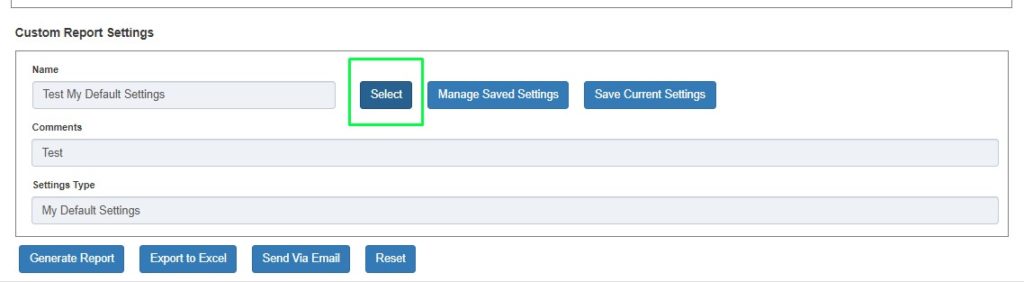
Step 7: Custom Report Settings:
User Can Select The Custom Report Settings Under This Section.
Click On Select Button.
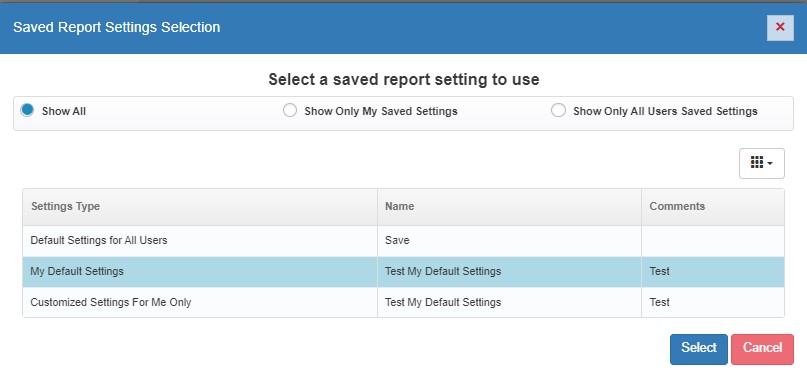
Select A Saved Report Setting To Use From The Saved Report Settings Selection Window
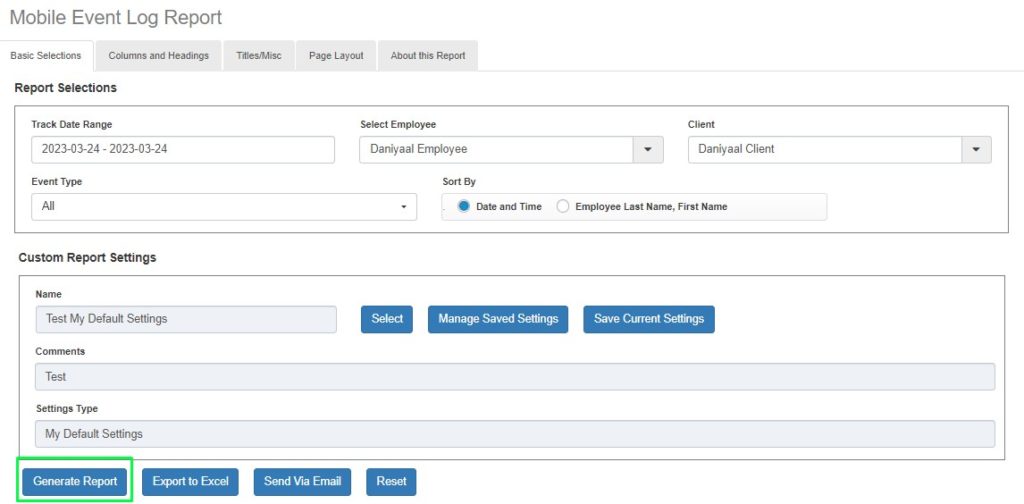
Step 8: Reports Can Be Selected In Three Ways: Generate Report, Export To Excel, Send Via Email.
User Can Select The Desired Way To Generate The Report.
Select The Desired Criteria And Click On Generate Report Button.
The Report Will Be Generated.
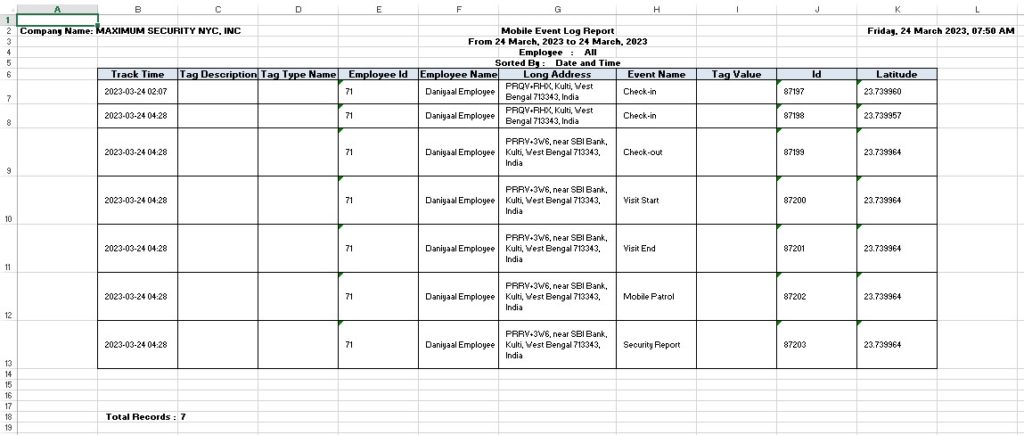
Select The Desired Criteria And Click On Export To Excel Button.
The Report Will Be Generated.
Select The Desired Criteria And Click On Send Via Email Button.
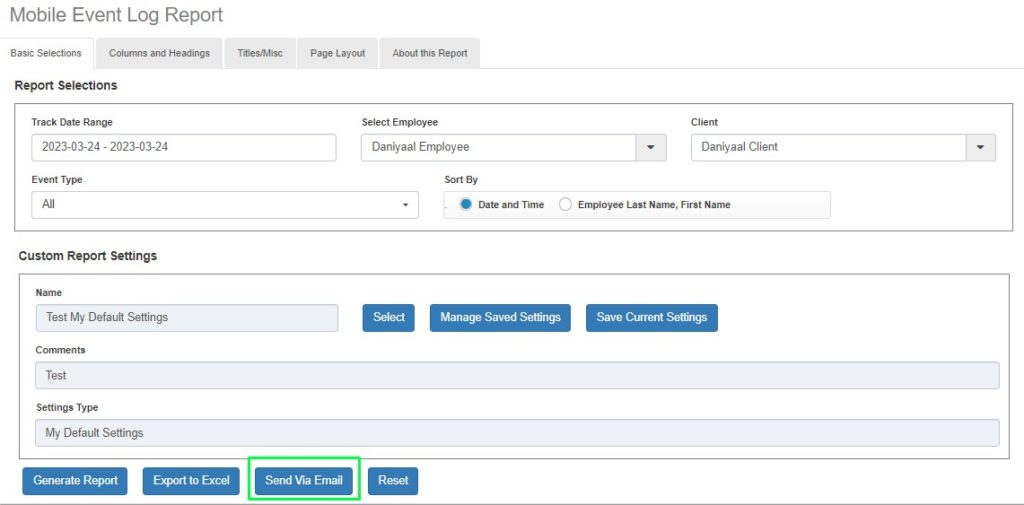
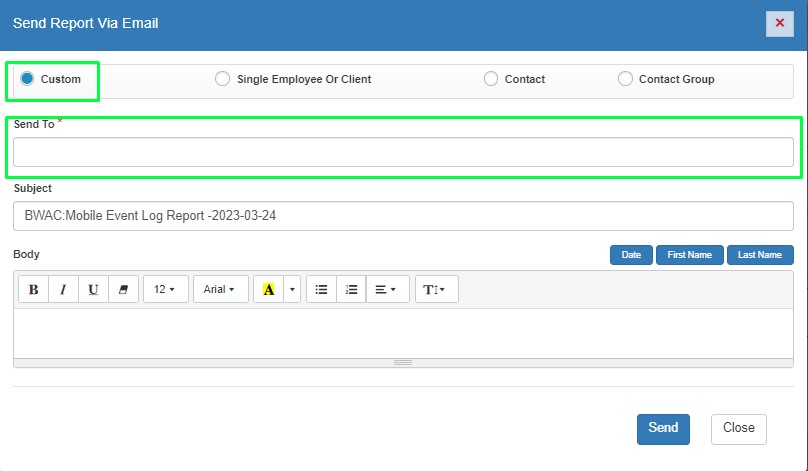
Send Via Email Window Will Open. It Has Options Like Custom, Single Employee Or Client, Contact, Contact Group To Choose From.
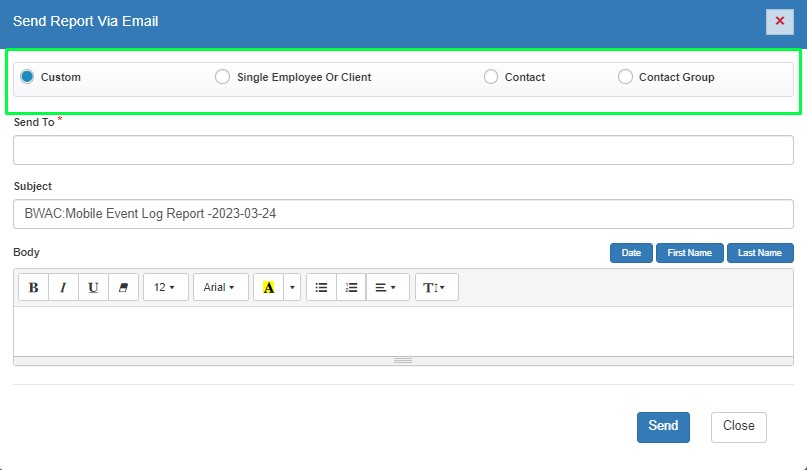
Custom Option Allows User To Enter The Email Id Manually In Which The Mail Will Be Sent.
Enter An Email Id In The Send To Field And Click On Send Button. Email Containing Report Will Be Sent.
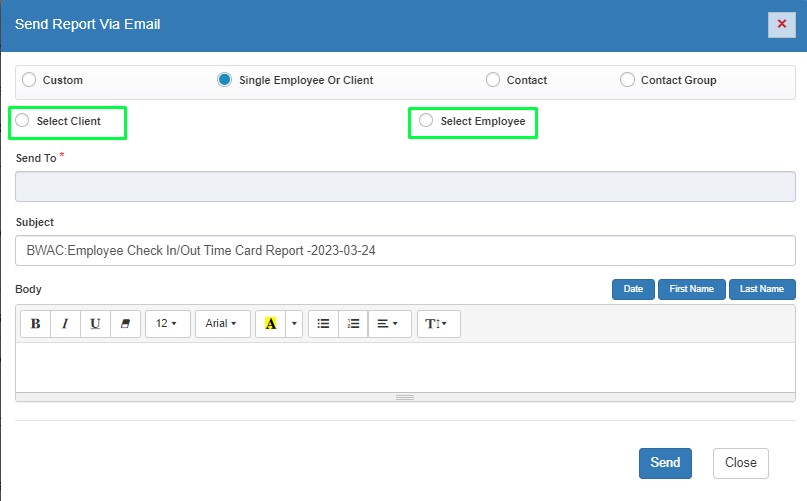
Single Employee Or Client Allows User To Select An Employee Or A Client In Whose Email Id Report Will Be Sent.
Select The Employee Or Client. Their Email Id Will Be Automatically Fetched And Click On Send Button. Email Containing Report Will Be Sent.
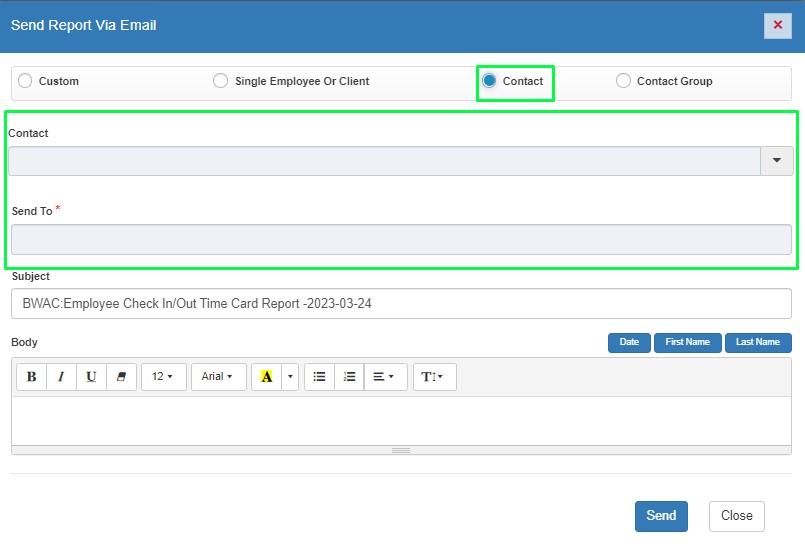
Contact Allows User To Select A Contact In Whose Email Id Report Will Be Sent.
Select The Contact. Their Email Id Will Be Automatically Fetched And Click On Send Button. Email Containing Report Will Be Sent.
Contact Group Allows User To Select A Contact Group In Whose Email Id Report Will Be Sent.
Select The Contact Group. Their Email Id Will Be Automatically Fetched And Click On Send Button. Email Containing Report Will Be Sent.